Jenkins
Jenkins is an an open source automation server which enables developers to build, test, and deploy their software. It facilitates continuous integration (CI) and continuous delivery (CD). You can find out more about Jenkins on their website.
Jenkins on Clever Cloud will allow your team to effortlessly setup CI/CD pipelines, executed on runners that deploy on Clever Cloud docker applications. This way, you will only pay for the CI/CD you really consume, to the second. You will also be able to access Jenkins interface by using the Clever Cloud SSO (Single Sign-On) Authentication.

Create Jenkins add-on
Jenkins versions
Jenkins has two releases pipelines: Weekly and LTS (Long-term support). By default, our add-ons are using the LTS version of Jenkins, those will include all security fixes needed. The Weekly version isn’t available during the creation, yet, but if you ever need it, feel free to ask our support team about it.
To create a Jenkins add-on, you can either use our web console or our CLI:
Web console
- Create a new add-on by clicking on the Create… dropdown in the sidebar and then an add-on.
- Select the Jenkins add-on.
- Select the plan you need.
- You can skip linking the add-on to an application, it won’t be needed.
- Enter the name of your Jenkins add-on and select the zone where you wish to deploy it.
- Select the options you wish to enable on your Jenkins add-on.
CLI
- Make sure you have clever-tools installed locally. Report to the getting started guide if needed.
- List the available plans and options for Jenkins:
clever addon providers show jenkins. - In your terminal, you can then run
clever addon create jenkins <app-name> --region <region> --org <org>whereapp-nameis the name you want for your add-on,regiondeployment region, andorgthe organization ID the application will be created under.
Refer to the documentation for more details on application creation with Clever Tools
Accessing the Jenkins interface
Once you created your add-on, you should get to the dashboard. You should see a link named Access Jenkins. Opening that link will redirect you to our SSO
authentication.
Clever Cloud has its own SSO (Single Sign-On) authentication to authenticate to various services. All members of your organization will be able to authenticate to the services in the same organization, using their Clever Cloud account.
When a service needs to authenticate you, it redirects to a login form. Enter your Clever Cloud credentials as well as your 2FA Authentication code if needed.
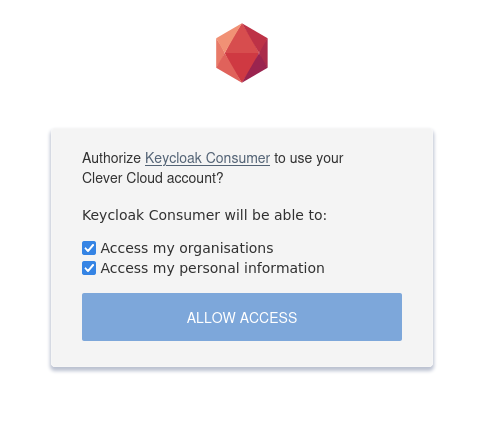
If it’s the first time you use the Clever Cloud SSO, accept the tokens permissions when asked for. Accept all the rights listed, otherwise the backend service might not work correctly.

If you mistakenly disabled some rights at some point, you have to revoke all tokens generated by this OAuth consumer:
- First, go to your user’s OAuth token in the Web console
- Then, find all tokens named
Keycloak Consumerand revoke them - Try to log-in again. The rights list should now be displayed.
Configure your Jenkins instance
Once you accessed your Jenkins interface, we can start configuring it. A custom Clever Cloud plugin is automatically installed on your instance during the provisioning. This plugin will allow you to configure the runners Jenkins will start to execute your jobs. Those runners will be Docker applications provisioned directly on Clever Cloud, in your organization.
Configure your runners
Using our Jenkins plugin, you can configure multiple runners. Runners can have multiple configuration customized:
- Label: Only Jobs that require this label will be able to use that runner. More on that below.
- Docker image: Select which docker image your job will use to run. More on that below.
- Virtual machine size: The size of the Clever Cloud scaler to use.
Before configuring the runners themselves, we have to configure a new Cloud. To do so:
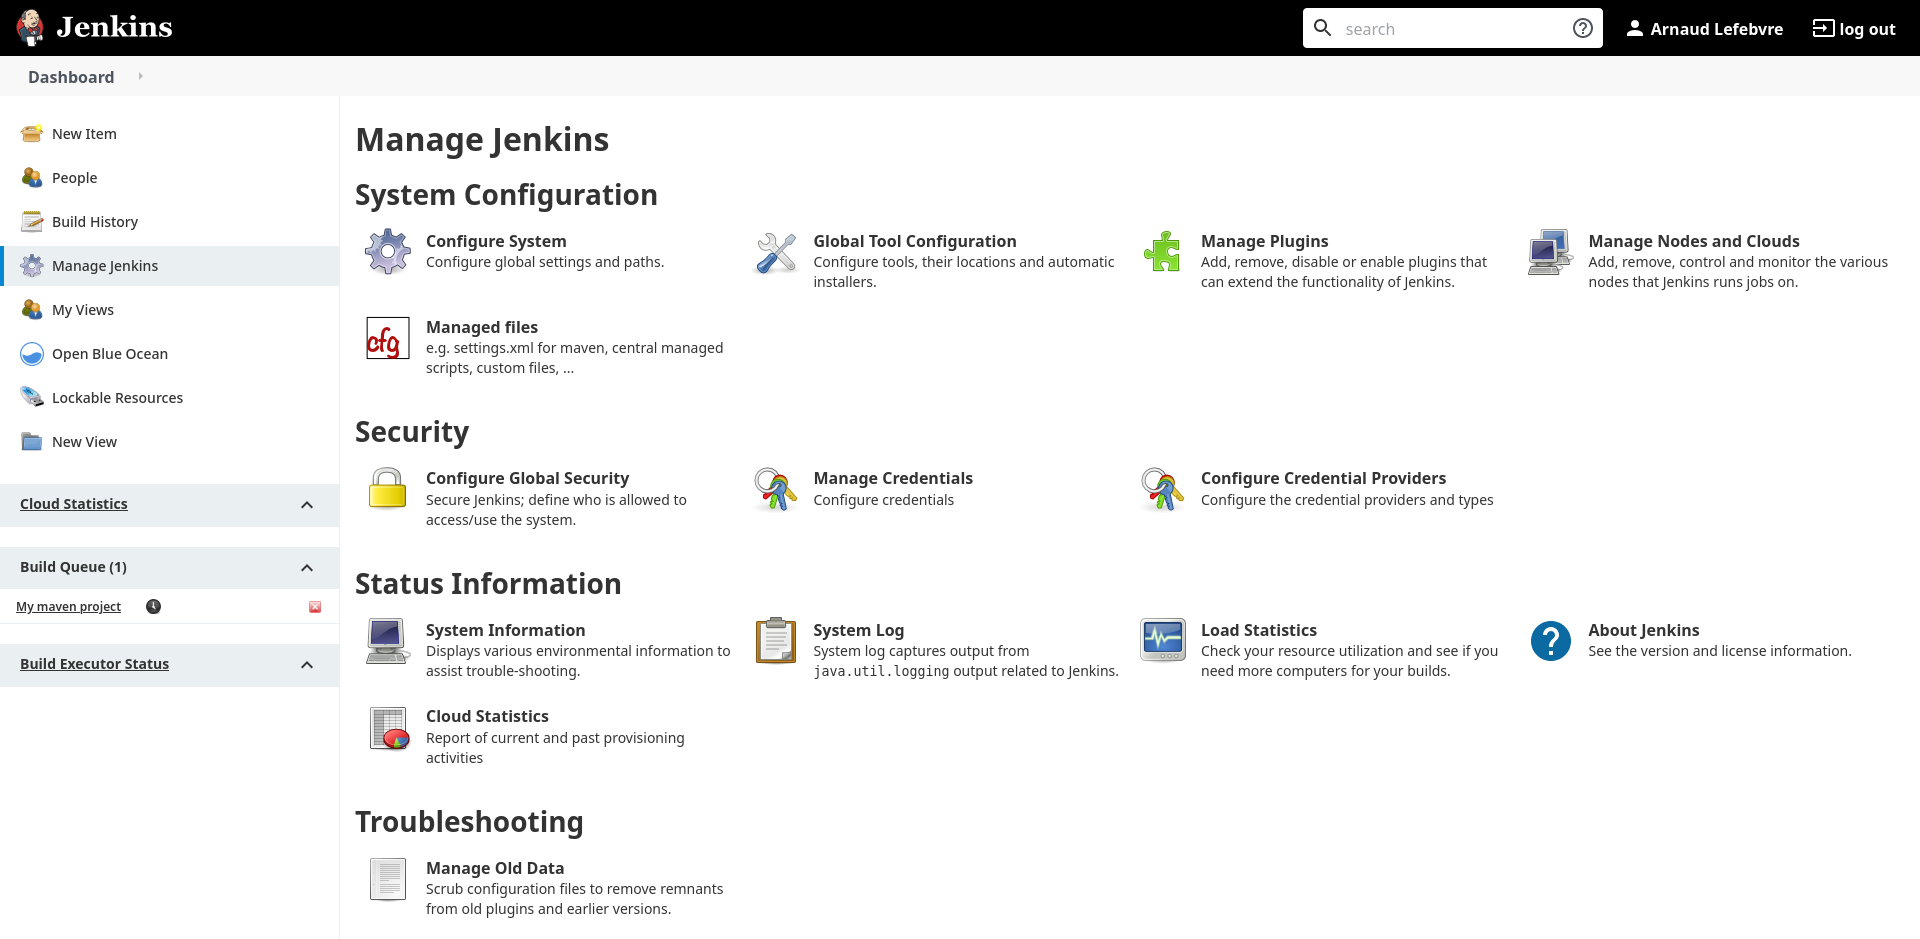
- Open the left menu, open the
Manage Jenkinslink. - Then, under
System configuration, open theManage nodes and Cloudsitem. - On the left menu, open the
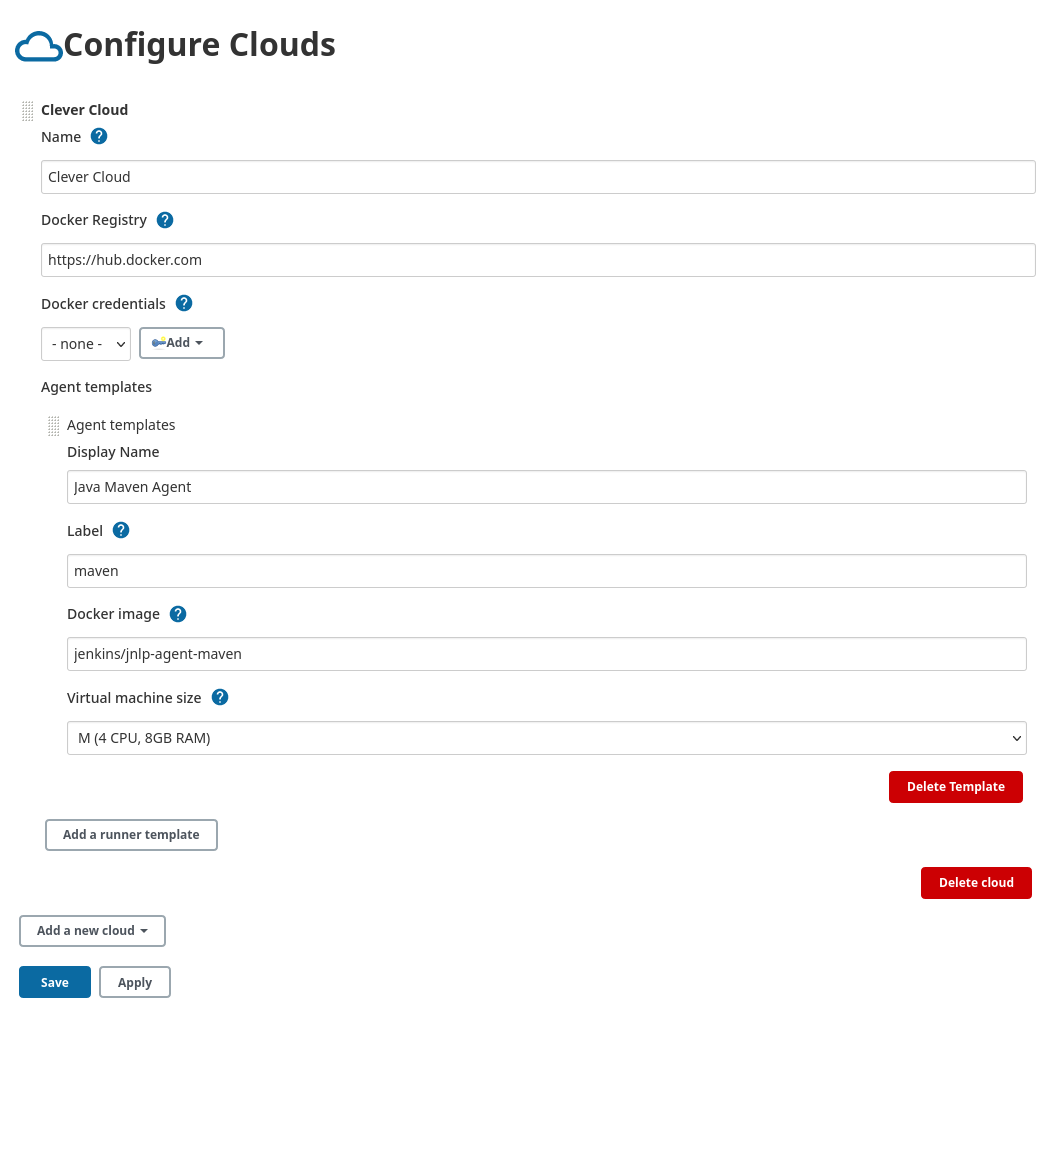
Configure Cloudslink. - A dropdown named
Add a new Cloudshould be displayed, selectClever Cloud. - In the
Nameinput field, you can enterClever Cloud. - You can also define a custom Docker registry to use with the associated credentials. Even if you stick with the default one (Docker Hub), we encourage you to add your credentials to avoid any rate limiting.
From there, we will be able to create runner templates. You can have multiple runner templates for multiple workflows. For example, you might need two runner templates:
- One for building and testing your Java Maven projects.
- One for building and testing your Frontend projects.
Let’s configure a runner template for Java Maven projects:
- Click on
Add a runner template. - Name your runner template, for example
Jenkins maven agent. - Set
mavenas the label. Jobs that require amavenrunner will then be able to execute on this runner. - Set the docker image your jobs will use. For example
jenkins/jnlp-agent-maven. Be sure to read the section about Docker image requiremetns. - Select the virtual machine size you need. For Java projects, let’s use a M instance that has 4 vCPUs and 8 GiB of RAM.

Once you configured everything, click on Save at the end. You should now have a runner template ready for Java Maven projects.
We can now start configuring a new Job that will execute on a runner that will be started using the template we used.
Labels
Label is a very important setting. Labels will restrict on which runners a given project can be run.
For example, if you have two runners templates with the following labels:
- maven
- nodejs
And you have two jobs:
- A first job that builds and test a Java Maven project
- A second job that builds and test a frontend application
The first job will be configured to only use the maven runners. And the second one will be configured to use the nodejs runners.
You might also want to only have one runner template for all of your jobs. If you omit this setting both in the runner template and in the jobs settings, then this runner template will be picked up to execute your jobs.
Docker image requirements
As of today, only runners on Clever Cloud Docker applications are supported. The Docker image you provide must contain the Jenkins Inbound agent.
By default, Jenkins provides a few Docker images that embed this agent. The agent will then connect to Jenkins to receive jobs orders.
You can find more details on the default Jenkins Inbound agent Docker image. Jenkins also provides various base images with pre-installed tools for some CI workflows on Docker Hub.
If you have specific needs, you must create your own Docker image with the Jenkins Inbound Agent.
Configure and run a Job
Jenkins has a large variety of options to configure a job. This documentation won’t cover them all, we will just go through a basic Shell Job. For more information, you can read Jenkin’s documentation.
In this example, the job will execute on a runner using the maven runner template we created earlier. It will basically print Hello world and sleep a bit.
First, on the left menu, click on New item. This will open the available jobs types:
- Enter a name for your project, let’s say
My Maven Project - Select the
Freestyle projectoption and clickOk - We will use a Maven runner template we previously configured to execute the job: Tick the
Restrict where this project can be runoption and entermavenin the text field - At the end of the settings, click on
Add a build step, selectExecute shell - In the command shell input field, enter:
echo 'Hello World!'
sleep 60- Save the settings.
Now that the job is configured, we can start it by clicking on the Build now button in the left menu. A message saying that the build has been scheduled should be printed.
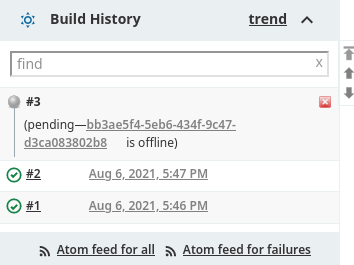
You should also see after a few seconds a pending Job in the Build history, on your left.

At the same time, a new application should have been created in your organization, named Jenkins agent <UUID>. The application should be deploying and once it gets deployed, the job
will start to be executed.

At some point the application should have deployed and you should be able to click on the Job’s number in the build history list. From there, you can open the Console Output
which is basically your job logs.
Once your job has ended, after the 1 minute sleep, the application provisionned in your organization will be stopped and deleted.
You should now be able to start creating jobs that automatically build and test your projects on a Clever Cloud application.
Jenkins File example
Here is an example of a Jenkins file taken from our CLI repository. It should be at the root directory of your project for Jenkins to pick it up. It basically builds our CLI project and publish it to various platforms.
pipeline {
  agent { label 'cc-ci-agent' }
  environment {
    GIT_TAG_NAME = gitTagName()
    S3_KEY_ID = credentials('CELLAR_CC_TOOLS_ACCESS_KEY_ID')
    S3_SECRET_KEY = credentials('CELLAR_CC_TOOLS_SECRET_ACCESS_KEY')
    BINTRAY_API_KEY = credentials('BINTRAY_CC_TOOLS_API_KEY')
    NPM_TOKEN = credentials('NPM_TOKEN')
  }
  options {
    buildDiscarder(logRotator(daysToKeepStr: '5', numToKeepStr: '10', artifactDaysToKeepStr: '5', artifactNumToKeepStr: '10'))
  }
  stages {
    stage('build') {
      steps {
        sh 'npm ci'
        sh 'node scripts/job-build.js'
      }
    }
    stage('publish') {
      when {
        not {
          environment name: 'GIT_TAG_NAME', value: ''
        }
        beforeAgent true
      }
      parallel {
        stage('cellar') {
          steps {
            sh 'node scripts/job-publish-cellar.js'
          }
        }
        stage('npm') {
          steps {
            sh 'node ./scripts/job-publish-npm.js'
          }
        }
      }
    }
  }
  post {
    always {
      archiveArtifacts artifacts: 'releases/**/*', fingerprint: true, onlyIfSuccessful: true
    }
  }
}

@NonCPS
String gitTagName() {
    return sh(script: 'git describe --tags --exact-match $(git rev-parse HEAD) || true', returnStdout: true)?.trim()
}
You can find more documentation about the Jenkins file syntax on Jenkin’s Documentation
Customize your Jenkins instance
Jenkins can be customized following your needs with a multitude of plugins. You can go into Manage Jenkins and then Manage plugins to manage them.
Plugins can be browsed from Jenkins own plugin repository.
Security and updates
Jenkins usually gets a lot of security releases as well as many plugins updates. It is important to keep your Jenkins up-to-date. Today that’s not something we automatically manage
but this may evolve in the future. In the meantime, you have full rights to update your Jenkins instance and its plugins. Usually, when Jenkins has a security release available,
it will be displayed as a notification and as a message in the Manage Jenkins administration page.
The Clever Cloud Jenkins dashboard also has an item informing you about available Jenkins updates.

After Jenkins or some plugins were updated, Jenkins will need to restart.
Update Jenkins
To update Jenkins, you can go into the Manage Jenkins administration page. If an update is available, it should ask you if you want to install it with a message looking like this:

You can then click on the Or upgrade automatically button. It should start downloading and installing the update. You can enable the option Restart Jenkins when installation is complete and no jobs are running and Jenkins will restart automatically. After a few minutes, it should be available again.
Update Jenkins plugins
Plugins can be updated by going into the plugin management page: Manage Jenkins and then Manage plugins.
Plugins that need to be updated are listed in the Updates section. You can check the plugins you need to update or check them all and then click on Download now and install after restart.
All plugins will be downloaded. You can enable the option Restart Jenkins when installation is complete and no jobs are running and Jenkins will restart automatically and install the plugins updates. After a few minutes, it should be available again.
Backup
By default, Clever Cloud performs a backup every day, with a retention of seven days. Retention and frequency can be customized for Premium customers. Backups can be found in the Clever Cloud Console in the backups menu of your add-on.
Did this documentation help you ?